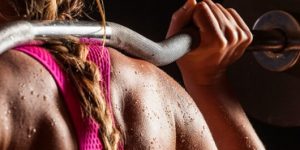
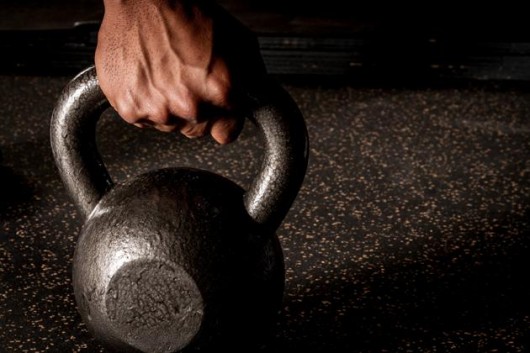
Kettlebells are all the craze, and probably you have seem them coming to a gym near you. They are generally met with a degree of caution and confusion by the average gym goer. Those that dare to approach them will inevitably attempt to move them in the same way as a dumbbell. Hence, I have observed gym folk curling them, doing Kettlebell laterals with them and swing them around in some mighty bizarre ways!
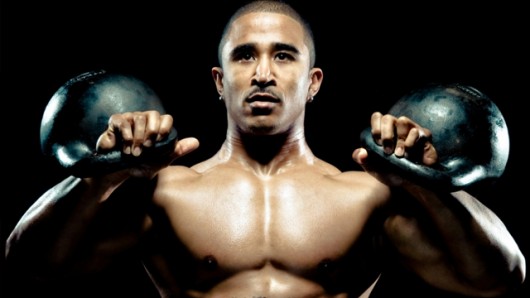
Kettlebells are an excellent strength and conditioning tool when used correctly.
This article will hopefully set you off in the right direction so as you can start using Kettlebells in your training.
Types of Kettlebell
There are generally two different types of kettlebell, cast and competition style.
Cast Kettlebells
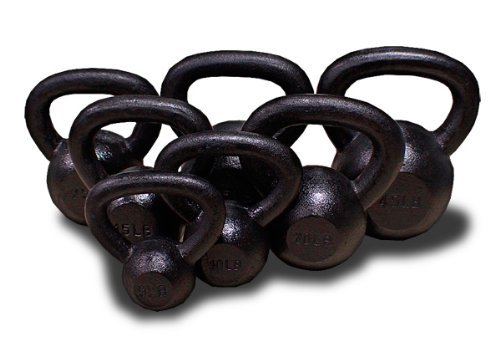
Cast, as their name suggests, are literally a solid moulding and therefore change size as they increase in weight. Because there are no set criteria for these bells, there are literally hundreds of different variations. They range from very good to extremely poor in general design and quality.
Competition Kettlebells
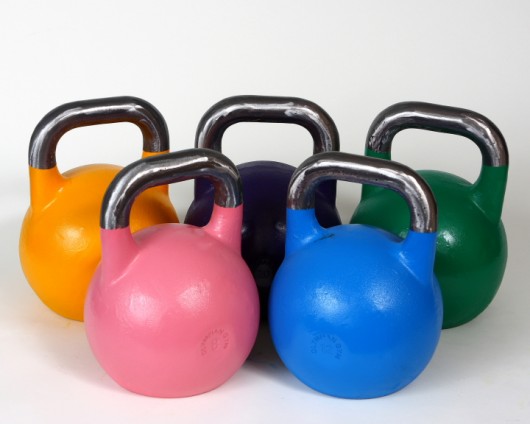
The other variation, competition bells, are designed to a similar specification. These are all consistent in size and the differences in weight are all down to the degree of steel used in their construction, some are simply more solid than others.
My preference is for competition bells. Let me tell you why:
- Once you get used to the way the kettlebell sits in the rack position (more on that later) and in the overhead position, you have consistency as you go up through the weights. An increase in weight doesn’t mean having to get used to something that has all of a sudden become a different size.
- The larger diameter creates a larger resting point on your forearm and will therefore feel more comfortable.
- They have a larger base and therefore are more stable when performing ground-based exercises such as renegade rows. This means that they are less likely to topple over, straining your wrist in the process.
- As their name suggests, they are the variant used in kettlebell competitions so if the urge to compete suddenly hits you, you’ll already be well on your way.
- You will no longer be at the mercy of poor kettlebell design.
- They look uber cool.
Of course, you are at the mercy of your gym if that’s where you train but that’s not a problem. Yet, if you buy your own, give serious consideration to competition style bells.
Footwear
Kettlebell training requires a good solid grounding with the floor. Therefore running shoes are not appropriate footwear for this type of training. Solid soled trainers or minimalistic type shoes such as Vibrams are ideal. If at some point you do decide to venture into kettlebell sport, then weight lifting shoes will be in order.
How to Start Kettlebell Training
Here is a list of exercises that you will need to master if you want your kettlebell training to start off in the right direction:
- The Swing
- The Turkish Get Up (TGU)
- The Goblet squat
- Rack Position
- The Deadlift
- The Clean
- The Press
Those are the six lifts (plus rack) that you need to master before you look at snatches or jerks or move onto double kettlebell work.
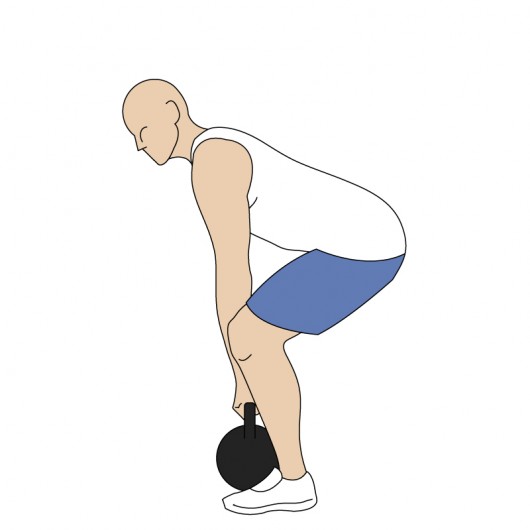
The Swing
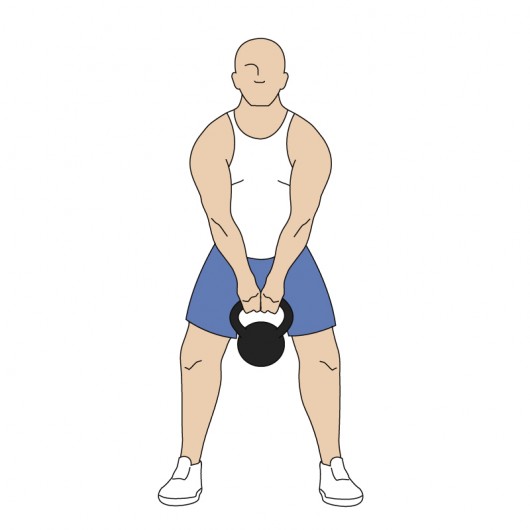

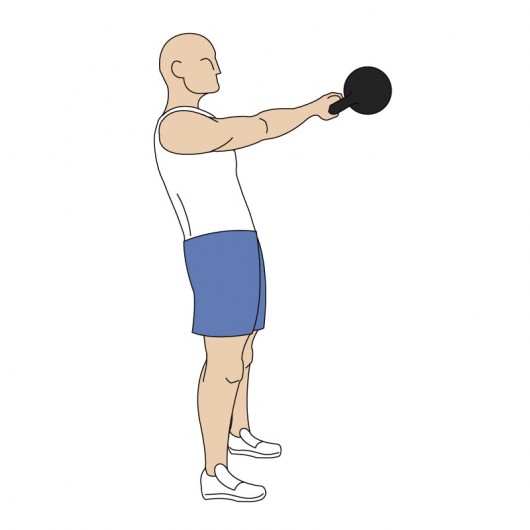
This is where you will master the hip hinge and learn how to use the powerful muscles of your posterior chain (Glutes, hamstrings, back extensors) to generate powerful force production to move the kettlebell in an explosive manner. It is the antithesis to all the sitting down the majority of us do all day.
How to Do:
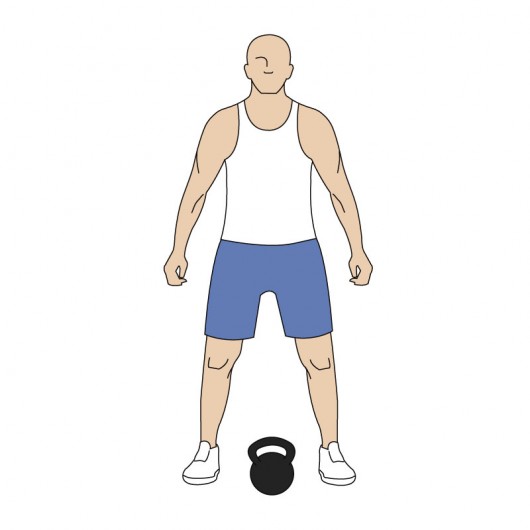
- Place a kettlebell slightly ahead of your feet.
- Your stance should be wide enough for the kettlebell to fit easily between your legs but not too wide. It should feel very athletic.
- Then think about pushing your hips back as if sitting back on to a bench making sure that you hinge at your hips whilst maintaining a straight back position although not upright. Think about trying to touch a wall two foot behind you with your backside. Your shoulders should be back and down. You will then be in the correct starting position. If you’ve got it right then you should be feeling a stretch in your hamstrings. I like to compare the position to a wicket keeper as he is readying himself for a bowler.
- Keeping your head in a neutral position, swing the kettlebell back between your legs as if you are passing a football to someone behind you. Get a good connection with your forearms against your inner thighs and quickly reverse the direction and drive though with your hips explosively taking the kettlebell straight out to a chest high position. Concentrate on projecting the kettlebell forwards as opposed to upwards. Tighten your glutes hard as you stand upright. Really concentrate on ‘snapping’ your hips through.
- Let the kettlebell swing back between your legs under its own momentum and repeat, but make sure you really load up your hamstrings by picking up the momentum at the bottom of the swing and driving the kettlebell back between your legs, get this right and you will stand up with greater speed and power.
- Remember you are not using the deltoids to lift the kettlebell. This is primarily a hamstrings, glutes and lower back exercise. If you experience any shoulder fatigue, your technique is wrong.
The Turkish Get Up
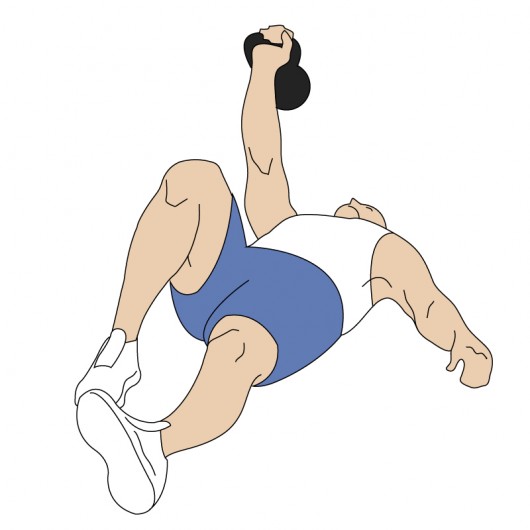
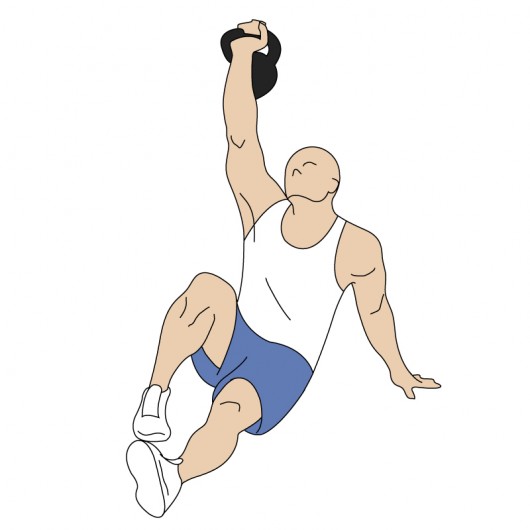
This excellent exercise and will relentlessly challenge shoulder stability, co-ordination, core strength, flexibility and cardio! A lot of bang for your buck with this one. For the purpose of description, I am describing a right handed TGU. You will also need to practice this movement with no weight initially.
How to Do:
- Lie on your back with a kettlebell positioned to the right of you and roll round to your right to face the kettlebell. Grasp with two hands and then roll back bringing the kettlebell to a position above your head. Once it’s steady remove the left hand. From this point on, keep the arm locked, do not take your eyes of the kettlebell and keep a strong straight wrist.
- Bend your right leg to a right angle and pull it in as close to your backside as possible. Keep the left leg straight and try to lengthen it as much as possible. Now actively pull your shoulder back into its socket by retracting your shoulder blade.
- Now Imagine you have a pole projecting out of your opposing hip, in this case the left. Sway the arm towards this pole to produce some momentum. As you do so attempt to get up on to your left elbow using abdominal strength. Get it right and it should be fairly effortless. Remember to not allow your right leg to collapse inwards as you do this, keep it strong and upright.
- Once up on your elbow, push up onto your left hand. This should be at an angle of 45 degrees to the ground.
- Now push your hips upwards as high as possible. You should have a straight line from the kettlebell right down to the opposing hand that is in contact with the floor. From this point, sweep your left leg round and back underneath you, finishing up on your knee. The knee should end up in a position whereas you are able to so perform a lunge. Then simply straighten up your body. You should now be in the lunge position. Your eyes should still be focused on the kettlebell.
- From here, squeeze the handle of the kettlebell hard. As you rise, grunt hard and maintain high intra-abdominal pressure. Stand up with the kettlebell, bringing both feet together. Lean back into the kettlebell as you stand. At this point which is the completion of the upward part of the movement, your eyes should be looking straight ahead. Pause and prepare to reverse the movement.
- To reverse, drop back down to your left knee. Then place your left hand down.
- Raise your hips and then move your left leg back to the starting position. Drop, carefully back down to a sitting position, then your elbow and finally back down to a lying position.
- From here adopt a two-arm grip on the kettlebell and roll back round on your side to release the kettlebell. Remember the lift is not completed until the kettlebell is properly rested on the ground.
The Goblet Squat
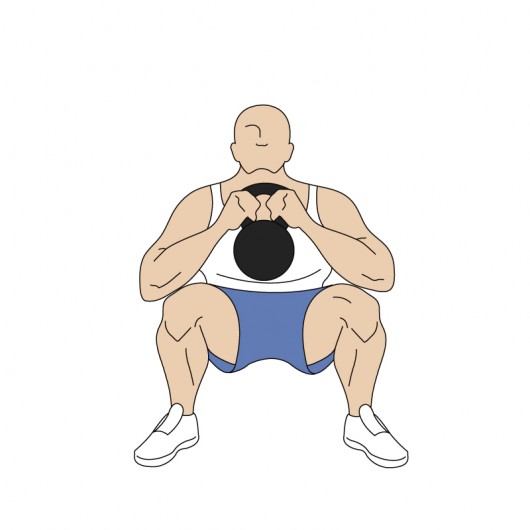
Providing you are reasonably proficient at body weight squats, then this is a great step up. Weight is held at chest level. The counterweight is actually beneficial to many people and may therefore actually improve your squatting mechanics.
How to Do:
- Hold a kettlebell to a 2 handed position holding the kettlebell by the horns.
- Position your feet approximately shoulder width apart with a moderate toe out position.
- With your feet firmly on the ground, attempt to rotate them outwards. They won’t actually move, but the sensation is off trying to create some torque or tension prior to squatting and to prevent your knees collapsing inwards as you squat down.
- Hold the kettlebell as close as possible to your chest.
- Brace your core and take a deep breath in.
- Descend as deep as you can whist maintaining your lower back integrity. Your squatting depth will be limited according to your flexibility. Only go as deep as good form will allow. Use a mirror. If your back starts to go into excessive flexion (rounding) then you are too dip.
- Really focus on squatting between your legs as much as possible by pushing your hips back and sliding your elbows down the inside of your knees prizing them apart as you do so.
- Hold the breath momentarily before rising back up out of the squat, exhaling on the way back up.
- At the top of the movement, tighten your glutes, reset your core and go again.
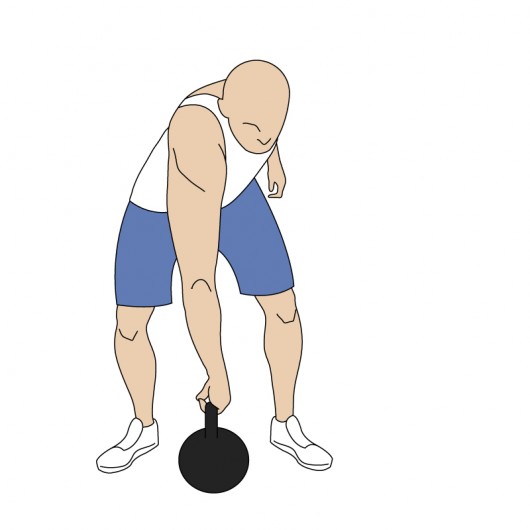
The Deadlift
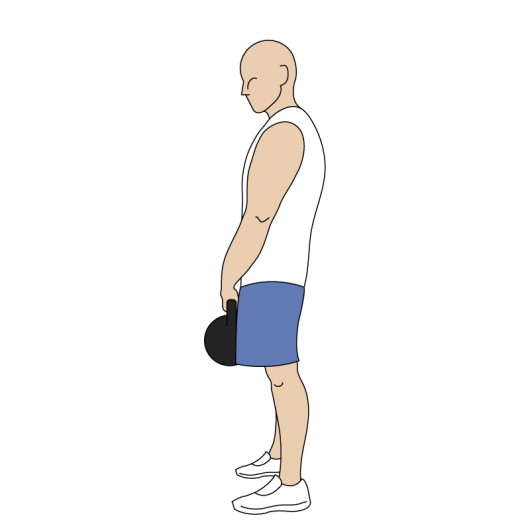
Another basic movement pattern that will have a strong carryover to everyday activities.
How to Do:
- Hold a kettlebell in front of you with both hands.
- Set your hips back and fold at the hip whilst keeping a straight back.
- As the kettlebell descends, don’t allow your knees to come too far forward of your toes.
- Once you touch the ground, reverse the movement and stand up tall.
The Press
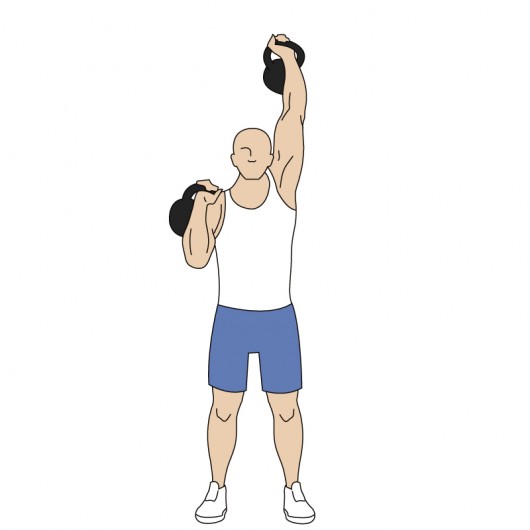
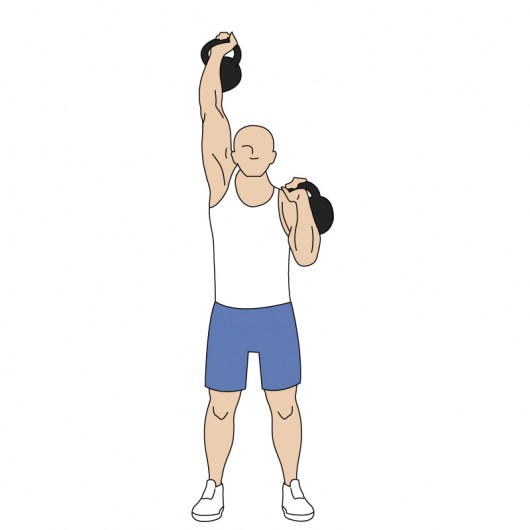
This will build solid upper body strength.
How to Do:
- From the rack position, tighten your quads and glutes.
- Pressurise by inhaling.
- Press the kettlebell overhead whist focusing on keeping the bell from rotating. Aim to keep your little finger pointing forwards.
- Exhale at the top of the movement.
- Inhale as you drop back down to rack.
- Re-set, go again.
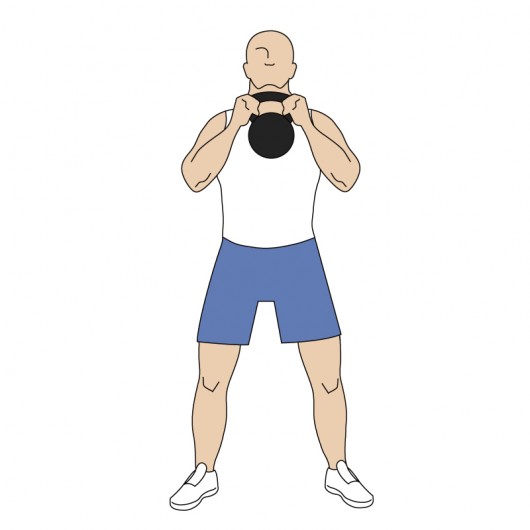
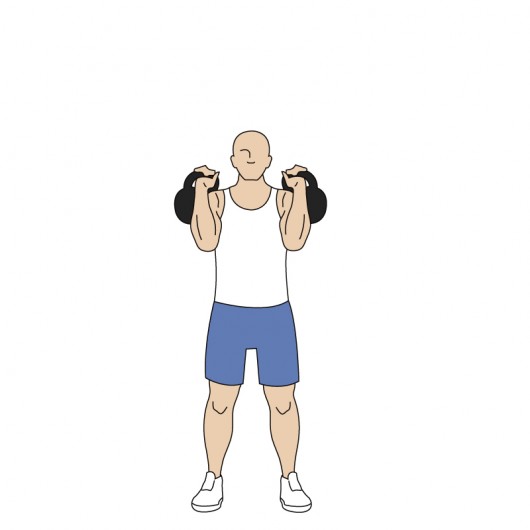
The Rack Position
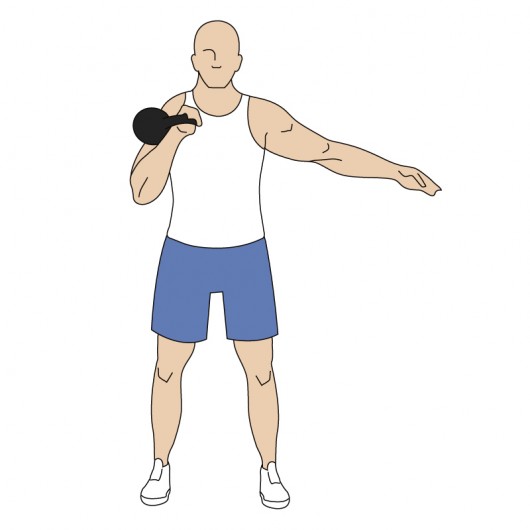
A solid rack position is vital for kettlebell lifting. A number of exercises are initiated from this position so it needs to be comfortable and strong.
How to Do:
- Your hand should be fully inserted into the bell handle. In this position, the handle should be at 45 degrees.
- If possible, get your elbow onto your hip. This is the bony projection known as the iliac crest. If you can’t reach due to anatomy or maybe because you are carrying a little too much weight, then aim to have your upper arm resting against your torso. In other words, no gap.
- The bell should be nestling nicely in the V shape of your arm.
- Lean back slightly so as the weight of the bell is over your base of support.
- You should be able to hold rack with a reasonable size weight in relative comfort for at least a couple of minutes after some practice.
The Clean
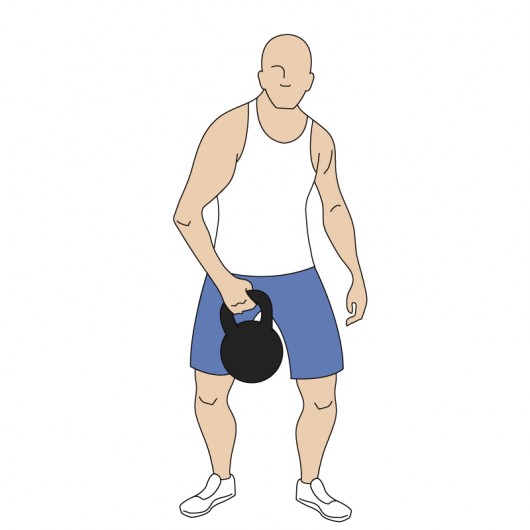
In order to get to the rack position, you need to learn how to do a clean.
- Place the kettlebell on the floor with the handle at 45 degrees.
- Grab the bell with your little finger towards the back.
- As with the swing, hinge from the hips and swing the kettlebell back between your legs before straightening up and ‘pulling’ the bell up into the rack position.
- As the kettlebell lands in the rack position, release your grip and allow the bell to fall down into the base of your palm.
Don’t rush it. Learn one thing at a time. Remember, if it doesn’t feel right, it probably isn’t. Kettlebell training tends to work that way. So, train intelligently adjusting things as you go along until your movements feel sharp and efficient.
Good luck, enjoy, but most of all, train safe!